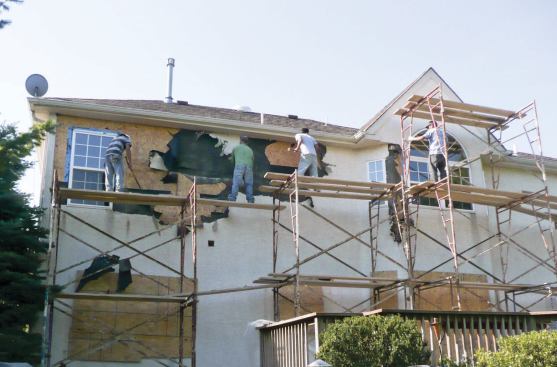
Repairs to leaking windows required removal of this house's exte…
Late last year, a couple called me about some leaking windows on the back of their 5-year-old stucco house. My company hadn’t built the home; it was part of a tract development in Southeastern Pennsylvania thrown up during the recent housing boom. Other houses in the neighborhood had similar problems, and the owners were frustrated that, despite several attempts, the original builder hadn’t been able to stop the leaks. They called me because I had fixed the same problem for neighbors across the street.
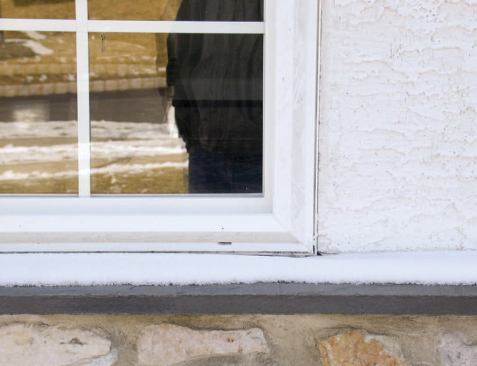
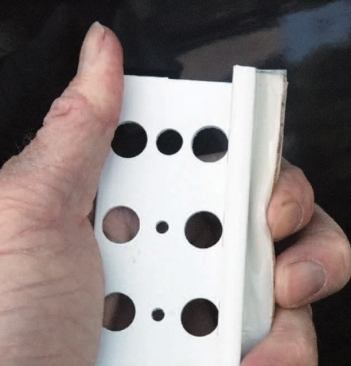
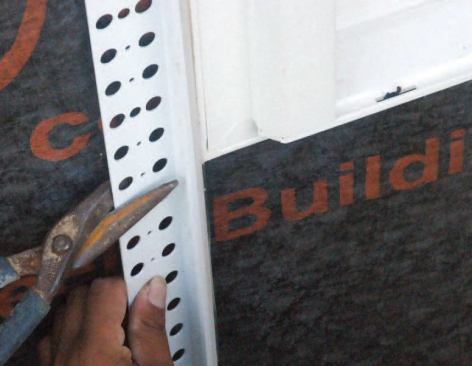
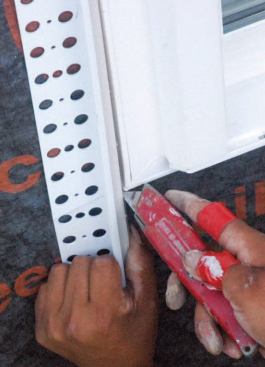
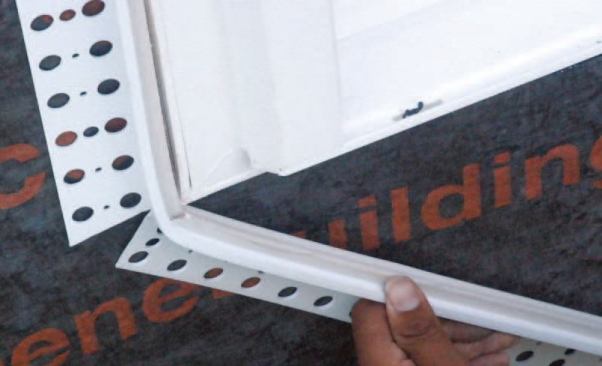
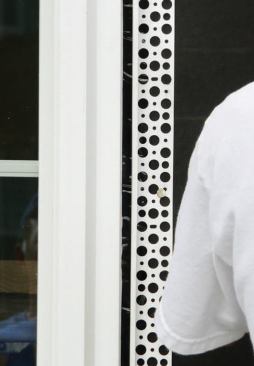
More often than not, the culprit behind a leaky stucco wall is a poorly detailed drainage plane, and that was certainly the case here. The first thing I noticed was that there was no casing bead around the windows. Casing bead creates a separation between the stucco and the window or door casings, so that the framing and sheathing can expand and contract without cracking the stucco or the windows. There’s a vinyl casing bead called E-Z Bead (www.amico-lath.com, 800/366-2642) made just for this purpose, but vinyl J-channel and backer rod work just as well.
Omitting the casing bead is especially problematic on a new home, where lumber can shrink a lot as it dries, placing great stress on casings and windows. On this house, movement in the frame had cracked some of the vinyl windows’ welded joints, allowing rain to get into the wall and leak into the house around the interior casings. If the windows had been properly installed, this water would have been directed back to the outside, so I suspected improper flashing, but there was no way to be sure without removing the stucco.
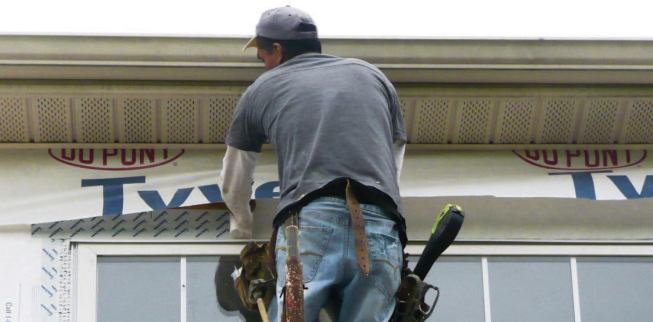
I proposed a job cost of around $29,000, which included stripping the stucco from the affected wall, removing and reinstalling the windows and doors with proper flashing, and applying new stucco. Replacing any rotted framing and sheathing we found would cost extra. The wall finish would consist of a layer of Tyvek StuccoWrap, a layer of Grade D felt paper, metal lath, and a three-coat stucco finish.
If you’re not familiar with stucco, you may wonder why we would use two layers of building paper. Since stucco bonds to whatever surface it’s applied to, that bonding surface can’t act as a drainage plane; there needs to be a separate, underlying drainage layer – in this case, the StuccoWrap.
View Drawing, p. 3
-
DownloadFixing a Botched Stucc…
 (1798kb)
Installing Windows in Stucco
Fixing the Problem
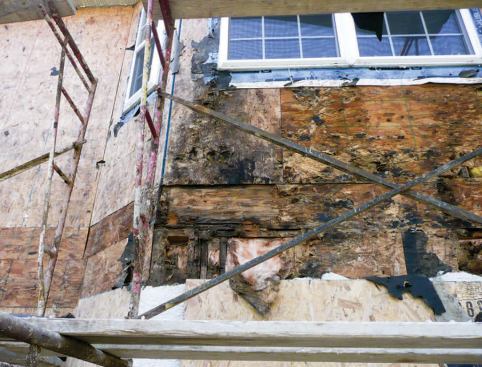
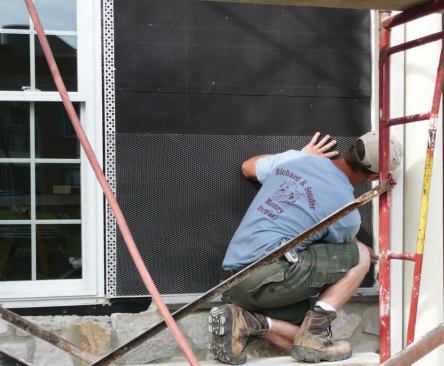
After covering the decking and ground-floor windows with plywood to protect against falling debris, the stucco contractor removed the stucco so we could see the extent of the damage. As suspected, the windows had been set in unflashed rough openings with their flanges taped to the sheathing, even across the bottom, so any water that leaked in was trapped. In some places, not only the sheathing but also the framing behind it had rotted. A total of 11 windows and doors needed to be reinstalled; we took them one at a time so the house wouldn’t be too exposed if a storm came up.
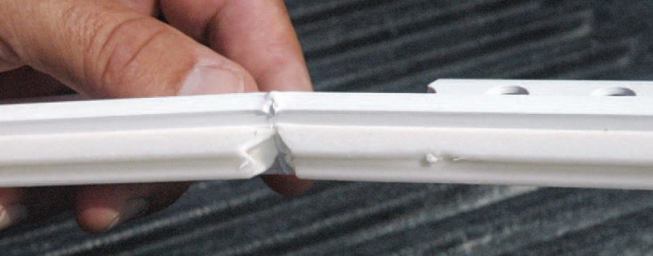
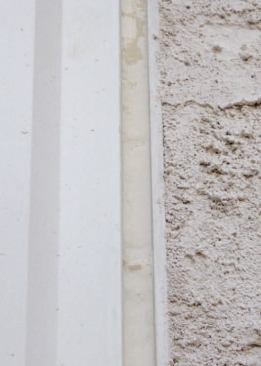
At the suggestion of our stucco contractor, we actually removed the 2×4 rough sills and ran them through a table saw to create a 5-degree bevel. We then reinstalled the sills and windows, following the flashing sequence described in the drawing on the previous page. The entire process took about 30 minutes per opening, including applying the casing bead. As mentioned above, E-Z Bead and vinyl J-channel are equally effective; with either one, the bead is separated from the casing by a flexible sealant joint. E-Z Bead has an integral foam extrusion that serves as the base for the sealant, while J-channel requires the use of foam backer rod.
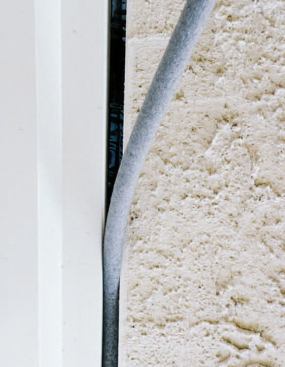
This vinyl J-bead is designed to accommodate expansion and contr…
Soffit protection. Because our stucco contractor had seen cases where wind-driven rain had entered soffits and soaked the sheathing, he also recommended that we remove the soffits and install strips of StuccoWrap along the top of the wall. We cut the strips wide enough so that the paper would run several inches past the bottom of the reinstalled soffits, bringing any water that blew up into the eaves back onto the drainage plane.
Stucco Application
After covering the Grade D paper with wire lath, the stucco contractor applied the scratch and brown coats and allowed them to cure for a few days. At this point, we caulked the E-Z Bead joints with OSI rubberized sealant, and the stucco crew followed up with the finish coat. We ran the stucco around the corners at each end and hid the joint between the new and the existing stucco behind downspouts. The job took about two weeks from start to finish.
Dave Haines is a remodeler in Doylestown, Pa.


